Showing posts with label home repair. Show all posts

Sunday, September 7, 2014

Another bed and some ideas for next Spring

I've wanted to get back out in the backyard last week, but laboring in a sauna is not something I was willing to do, so I did other things this week.  Mostly sitting on the couch looking up stuff on the internet.  Productive stuff.  No, really.  It was.  Scout's honor.

See, I found this youtube channel by a guy named  Larry Hall.  Basically, you take some vinyl rain gutters and some two by fours, some containers, net cups and some potting mix and you create a self-watering system in which you can grow amazing vegetables in containers.  Since I have an entire driveway that extends all the way into my backyard that gets sun all day long, I've wanted to do a container garden there forever.  These are cool, because it will eliminate me having to water those containers to keep everything alive.  The nutrients go right into the water, which is pretty efficient, sort of borrowing from hydroponics.  I'd probably use compost tea in mine, as I don't want to use chemical fertilizer.  The other thing is that here where I live, I would have to take steps to prevent creating a mosquito breeding ground.  Still, I love the idea - it's simple as can be, inexpensive and I can use grow bags, which are better than buckets or plastic totes since the roots self-prune instead going round and round and eventually killing the plants.

Then, in my travels, I found this guy.  Another thing I've wanted to do again is to grow potatoes in containers.  Besides having a great accent, I love what he is doing with the potatoes, even if he does use chemical fertilizers.  That's easy enough to bypass and again, watering with compost tea would work wonders.  So again, I'm filing this away for next year and in fact, I think I would combine the two ideas and grow potatoes with the rain gutter self-watering system.  I wish I found this in the spring, because I would have done it this year, but oh well.  The possibilities for next season abound!

In the meantime, I decided to start another permaculture-type garden bed with sheet mulching.  I surveyed the backyard this morning and narrowed down two possible sites.

The first site is near the fence and at the moment is a tangle of pachysandra, ivy and thistles.  Probably a few dandelions there too.  You can see the last of the phlox flowering and there is a rose bush struggling to the left.  Sterling, I think.  It doesn't get sun in the morning, because its close to the back steps of the house, but I knew I wanted to put one of the fruit trees I've ordered there.  Possibly the apple, since it would be fairly close to my existing apple tree and cross-pollination, ya know.


The second site gets a good amount of sun every day and would be a great place for tomatoes, peppers and possibly another fruit tree.  Right now, there is a type of perennial sunflower/daisy thingy I purchased at Fordhooks on a whim and it is much, much too big for that space.  I keep it cut back, but if I didn't, it would get over 8 feet tall.  This is actually what grew back after I dug it up and replanted it toward the back of the yard where the size made sense.  So, yeah... this one is going to have to go.

After mulling over both possible sites for the new bed, I ended up choosing the first one for a very simple reason.  (and this is where my youngest daughter should stop reading)  Bees.  Those yellow flowers are a bee/moth/butterfly magnet and I figured I would give them a few more weeks of luscious pollen before tackling this bed.
Decision made, I hauled out the weed whacker and discovered several new curse word combinations.  I hate that darn thing.  It's inexpensive (cheap) and the strings don't advance automatically like they are supposed to and most of the time, whirl back onto the spool.  

At any rate, a short vocabulary building exercise time later I had this
Chop and drop.  
I spread some newspapers I purchased this morning (I should have read them first, I suppose), wet them down and added a layer of cow manure and wet that down too.
Then I mixed a five gallon bucket of my compost with ten gallons of peat moss, about 3 gallons of vermiculite, two big handfuls of pulverized lime and a handful of Epsom salts.  

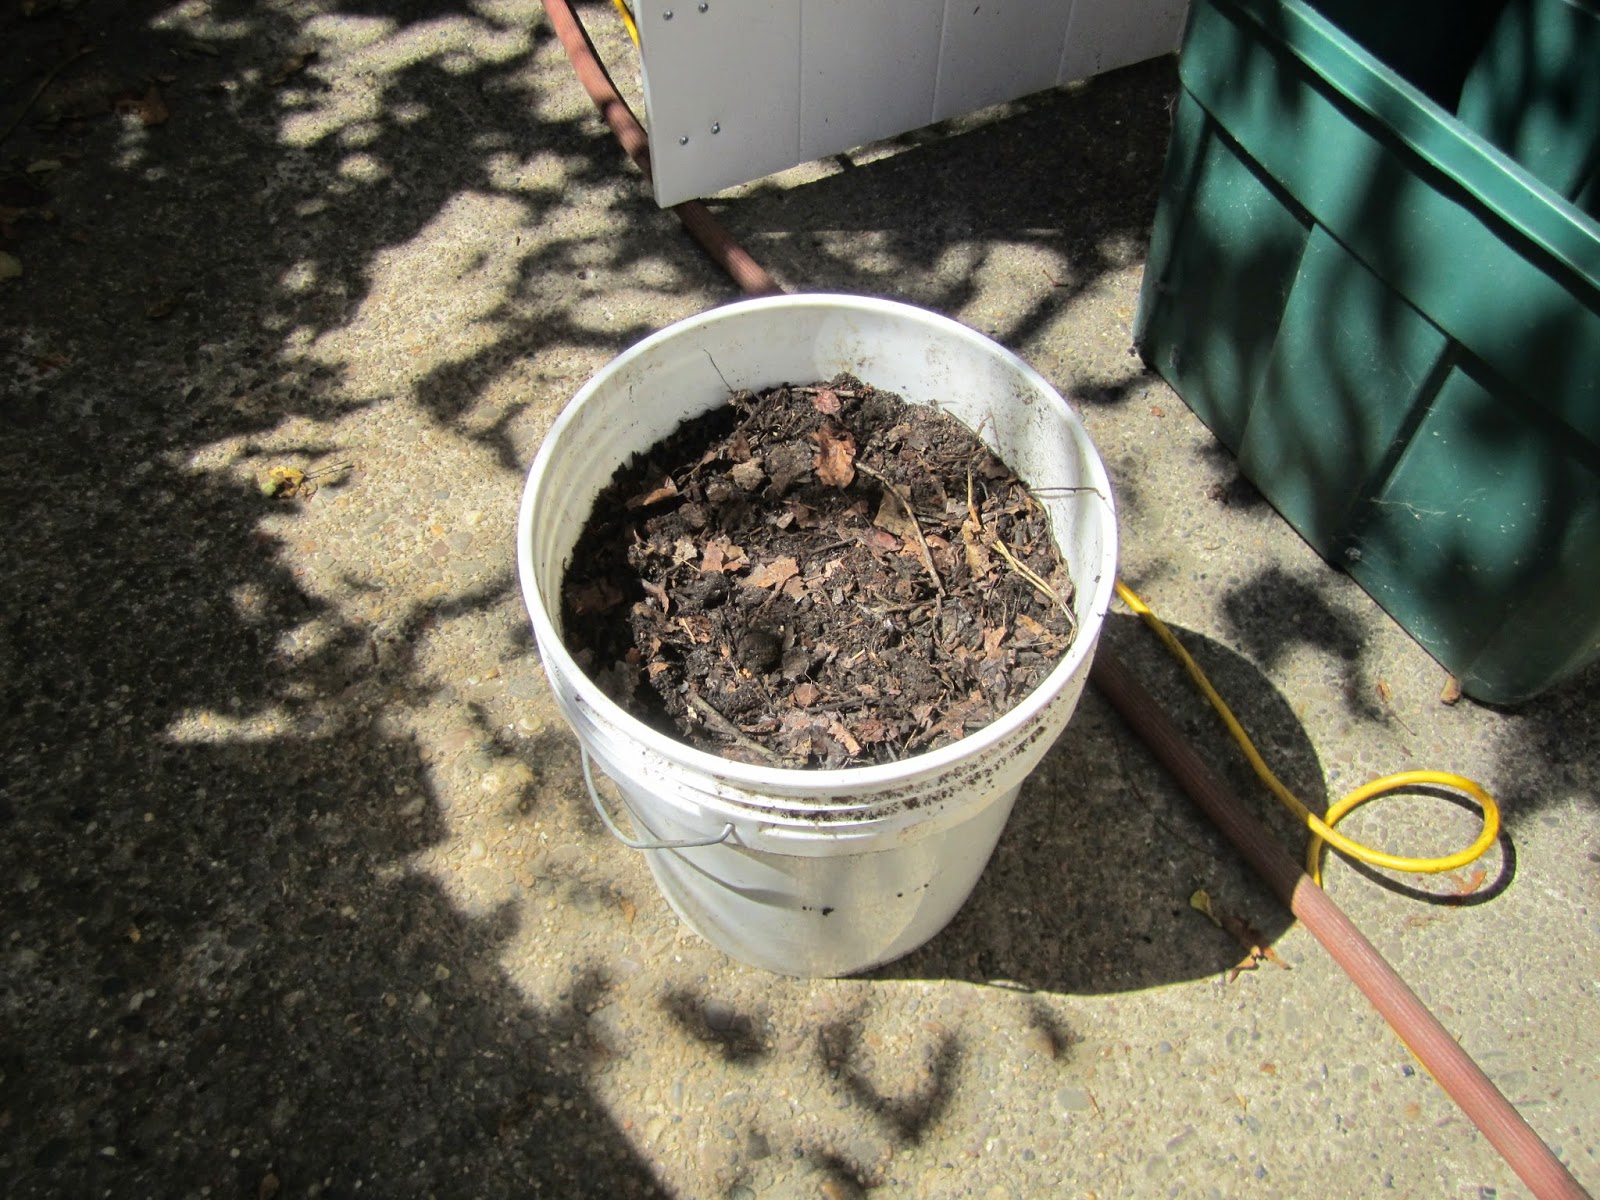
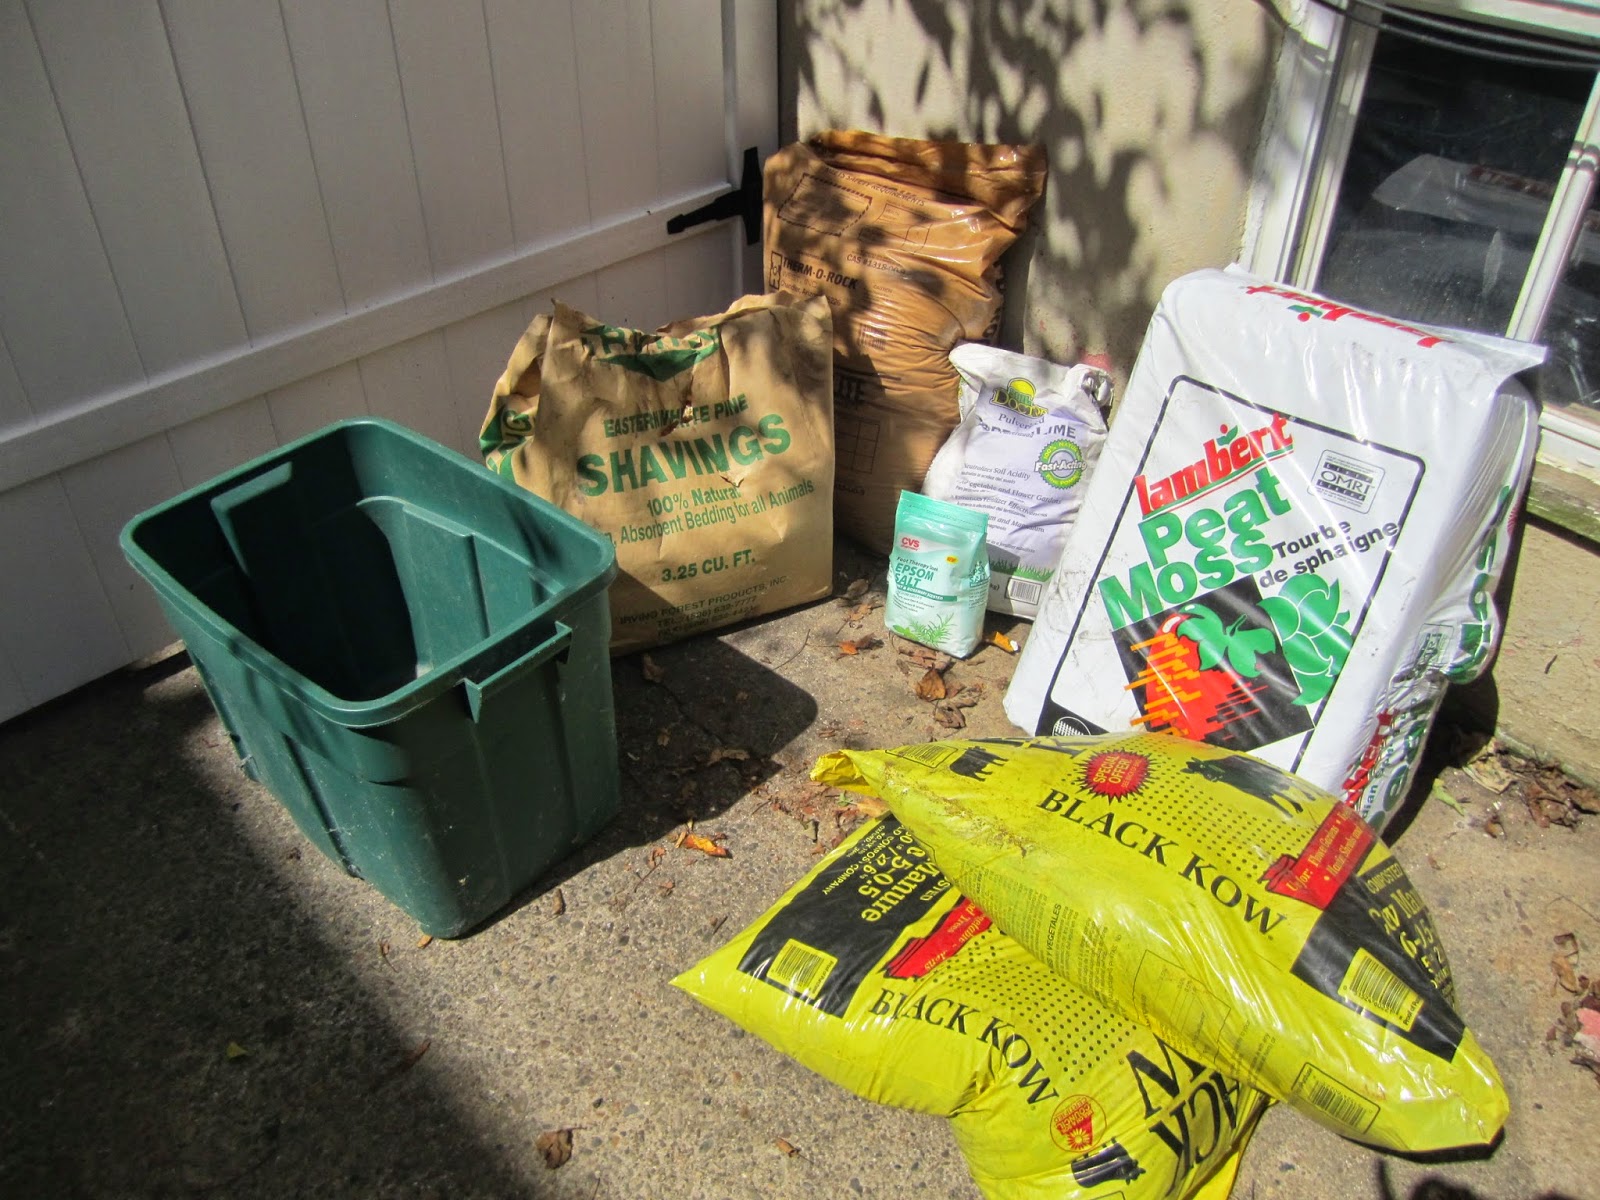
I spread half of that mixture over the manure, wet it down, then another layer of manure and topped that off with the remaining soil mixture, wetting each layer down.  Once I got that smoothed out to my liking, I spread a layer of pine shavings over the whole thing and gave it a good soaking.  
Here's the finished bed.  I would like to get another couple inches of pine shavings on top before winter hits, but I'm pretty happy with it so far.  No digging is always a good thing.  Time will tell whether or not the pachysandra and ivy actually succumb to this method or not.  They may just rear their heads, look in my direction and say, "Thanks for the manure, lady."  I'm also wondering if the poor little rose bush will benefit from this sudden glut of nutrients.  Hope so.

For those of you who may be wondering about the addition of lime and epsom salts, the lime is for the calcium and the salts are for the magnesium, both of which prevent blossom end rot in tomatoes, melons, peppers, etc.  It's not enough to neutralize the acid that the manure adds, but will make a difference to the plants.  The peat moss and vermiculite were added because I have a fairly dense clay soil and I wanted to aid in drainage, especially at this particular bed site, since it sits pretty close to my downspout.  

After everything was said and done, I weed whacked the walk again and then decided to take a few pics of my backyard as it is now to share with all of you, plus one of the tree well bed I finished a couple of weeks ago.
New bed and walkway  
Coral Bells in flower
Creeping Charlie.  Someday, I'll make beer with it.

Bed I did a couple of weeks ago.  I ended up planting Russian sage, lavender, Greek oregano and English thyme on this side.  The other side is all seeded with garlic, which has not made an appearance yet.


Well, gentle readers... that is as they say, that.  At least for now.

Sunday, September 1, 2013

What if...?

My original idea with the porch was something like this, but as I was pricing out materials I had a brainstorm.  I thought perhaps I could do something that would echo the interior trim of my house.

That's a bit dark, so here's a close up of one side of this window.
After thinking about this for a while and pricing out materials, I decided to do a plain panel and then do trim with a combination of 4" board and 2" board.  Since I didn't install the top board with the thought of 1" board being installed under it, I'm going to try to find 1/2" board to use instead, but I don't know if I can find that in 8' sections, which is what I need to do the top and bottom trim, but I will have to see.

In the meantime, I bought the panels for the front and back of the first railing I had framed out.  After fighting with the drill and the wood screws, I was able to attach both panels and I'm pretty pleased.
From the outside - you can see I still have to scrape
and paint the base of the porch.

From the inside.  I like it!  It's going to give us some
privacy, which will be nice.

The next thing I probably should do is go ahead and put a couple coats of paint on at least the outside board to protect it from the elements.  Rain is called for tomorrow and I don't want this to get warped or the fibers to get raised.

I think I'm going to work on the front railing next, even before I get the trim pieces up.  That way, I can get a real feel for what the finished porch is going to feel like.

Once I get that done, I'll do the trim, finish painting and then I will turn my attention to putting in indoor/outdoor carpeting.


 I've picked out a nice neutral carpeting which I think is a real step up from the old astroturf of my youth.

I think this will give this little space some comfort and a feeling of tranquility, plus and this is a huge plus, it will keep the tiny vampires from coming up from underneath the porch and tapping into my veins for a liquid lunch!

Now For Something Completely Different

Hello Gentle Readers,

First off, please forgive my absence - I've had a bit of an adventure.  You see, for the past 5 years, I've been pursuing my undergraduate degree at the University of Pennsylvania.  In August, I succeeded in achieving a goal I have been working on for 38 years and received my degree in English with a concentration in Creative Writing.

Honestly, it was a big accomplishment and I was tired., so I went on vacation.  I have friends who live in Wasilla, Alaska (Hi Dustin & June!) and they invited me to come and visit.  Off I went.

It was beautiful - unlike any place I've ever visited.  The first day there, we went to Knik Inlet.  We saw whales!


I know you can't see them, but those ripples out there are beluga whales.  Trust me.

See those clouds?  This was weather that stayed for the entire 7 days I was there.  It's weather, so what are you going to do about it?  Honestly, the only time it was really sorta a pain was when we went to Denali.

We stopped at a scenic overlook and there was a panorama sign of the mountain range including Mt. McKinley.


This is actually what we saw directly above this sign.


Nuthin' but clouds.  Ah well.  I still had a great time and got to see a lot of really cool stuff.
Dog Sled Team in Training

Little Susnita River in Hatcher Pass.
 It's that color because it originates in the Mint Glacier.  Isn't it pretty?
 On the way to Denali (or was that Talkeetna?) We saw a dog sled team training with a 4X4.  I think there were 17 dogs altogether and I gotta say, those were some happy puppies.  They have a job to do and gosh darn it, they were doing it.  It was fun seeing them.

We also visited the Iditarod Headquarters in Wasilla.  It was an interesting place.  I know there is a lot of controversy involved with the race and I'm not coming down on either side of that but the history of the race is interesting.

Yearling Moose Calf (one of a twin - the other one is near the tree line)
We drove up over Hatcher Pass and stopped to take pictures of the Little Susnita River.  It was a gorgeous mint green tint, but man, it did look cold!


On the way back to Wasilla, we saw these two yearling moose calves.  They may be calves, but they were still the size of horses.  Mommy moose was no where to be seen, but maybe she was back in the trees there.


I'm back home now and after spending a week getting readjusted to my time zone, I'm ready to get back to my porch project.

Next post - porch railings continued.


Friday, August 16, 2013

It Takes A Village...

Today I woke up with a clear vision in my head of what I wanted the porch railing/wall to look like.  It would have to be 36" tall with a wide shelf all the way around to hold drinks or maybe a pretty potted plant or two. Because of this, the design had to be modified slightly.  Instead of the end posts reaching all the way up to the ceiling with the eventual screening in mind, I would cut the studs, lay the board for the shelf on top and when I am ready to screen it, I could just cut a stud from the shelf to the ceiling.  No biggie.

This might be better anyway, because then I could take the screening down at some point without having to tear down the railing or trying to make awkward cuts sideways to cut it flush with the railing wall.  I'm not sure the set of circumstances that would lead me to take down the screening - perhaps a sharp blow to the head or some world wide event that led to the destruction of mosquitoes, but you never know.  I'm sure the little bloodsuckers fulfill some sort of biological nook that if empty would lead to something horrible, such as a shortage of hops or some such catastrophe.

At any rate, after employing my youngest daughter, I was able to obtain accurate measurements.  Guess what?  The top rails were indeed slightly bigger than the bottom ones.  Measurements in hand, I headed down to the local home supply and purchased my supplies.  I decided to try my idea out on only one side for the moment to see how I liked it, so I only bought enough material for the driveway side.

Since I don't own an electric saw, I got one of the helpful sales associates to cut my pieces to my specification.  This is one of those services they offer that is priceless.  I also stopped and looked at house numbers and signed up for a free estimate on a kitchen cabinet facelift.  Or whatever they call it.  Where they take the doors and drawer fronts off and slap some new ones on and veneer the cabinet bases.  That thing.  I doubt I would go for such a thing at this point, simply because a.  the cabinets are of the cheapest quality (although they ARE wood) and b.  I want the kitchen to be redesigned to actually be practical.

Getting back to the porch... here is my materials list:

1.  4 2X8 framing studs cut into the following lengths:

  • 83" for bottom rail
  • 83 1/4" for top rail
  • 4 pcs 32" 
2.  1 8"X1"X96" pine board cut to 83 1/4" long
3.  Finishing nails
4.  Masonry screws
5.  3" long deck screws guaranteed not to rust
6.  Caulk 
7.  One male neighbor to come over half way and tell me what to do

I did not have to get that last one at the store, since I already have several of those at home.  I got home, dug out my drill and got to work.  There were a couple of moments where things started to go pear shape, but I persevered and this is what I ended up with:


Now from the other angle:


I'm pretty freakin' proud of myself.  Now I have to get the panels and attach them to both sides to finish it up, cover the edges with molding, paint it and I've got my first railing/wall done.  

About the point at which I got the top rail attached and was trying to figure out how much of an overhang I wanted for the shelf (known as the reveal), one of my male neighbors came over to tell me to use screws and not nails because I was "killing myself with the nails."  I held up the drill and a handful of screws.  This did not bring the instruction to a close, however. 

 "Use finishing nails for the top and then take this little thing that looks like a round screwdriver and tap the ends into the wood."  

"A nail set," I said.

"Yes," he said then continued, "Then hit it with some wood filler and it will look great."  

"Thank you for your help," I said and after he walked away, I walked over and picked up the box of finishing nails, the nail set and the wood filler I had sitting on the porch about 2 feet from where he was standing.  I've got this.  


Sunday, August 11, 2013

Porch Project - Scraping, Sanding, Washing...

Ugh!  That's all I can say!  What a hot, sticky, miserable job to scrape all the loose paint.  About 1/2 way through, I was tempted to go in the house, snag one of my daughter's beers and burn the paint off with vile curses I hurled at it from the comfort of my air conditioned living room.  But alas, that will not work in this universe (I'm totally putting in a request for that super power), so I persevered, urged on by the constant mosquito strafing and finished it up.


After I finished scraping, I gave the whole porch a light sanding with a medium grade sanding sponge, switching up when the sandpaper seemed gummed up (it took three altogether).  Once that job was done, which seemed like a walk in the park compared with the scraping, I swept up all the debris and got ready for the next step.  By getting ready, I mean getting a hoagie for lunch and watching an hour of HGTV in the air conditioning.

After dragging myself  eagerly returning to work, I filled a bucket with warm water and a healthy squirt of the blue dishwashing detergent preferred by oily penguins and started to work scrubbing the woodwork down.  Up until this point, I was just sweaty with decorative paint chips plastered to my cleavage (and in my bra as I later discovered), but as filthy nasty water showered down on me I moved into a whole new area of funk.  10 years of dirt and whatever all loosened up, I then turned my hose on the wood and got it all rinsed until no more suds were seen.

Since I got the wood pretty saturated, I decided to wait until tomorrow to start painting.  I went inside, got a nice long hot bath and took my daughters out for dinner at Kraftwork in the Northern Liberties section of Philly.  If you're ever in Philly, you MUST go to this place:  great beers, wonderful food in a great atmosphere.  Shameless Philly plug finished.

Oh one thing I have to replace is my house numbers.  Even though I tried to very carefully remove them so I could put them back (not that they are exceptional or anything - just didn't think about replacing them), this is what happened:

Poor little tiny number one.  He used to be big, but snapped right in half and then some.  Oh horrors... now I will have to find some on the intertubz that appeal to me.  Darn.

Next up... Painting!  But now it is time to feed my kitties before they eat my soft bits.